But thats no fun.
And besides, I saw this amazing picture on Pam of Pam's Girly Bits Instagram and thought it was pretty fantastic and wanted to recreate it. But I couldn't just recreate it and post it on here. Thats kind of dumb. So I tried to do something different, and better! But I'm not sure if all my ideas into one mani played out well. You decide! (but please forgive my horrible stamping skills)
Materials -
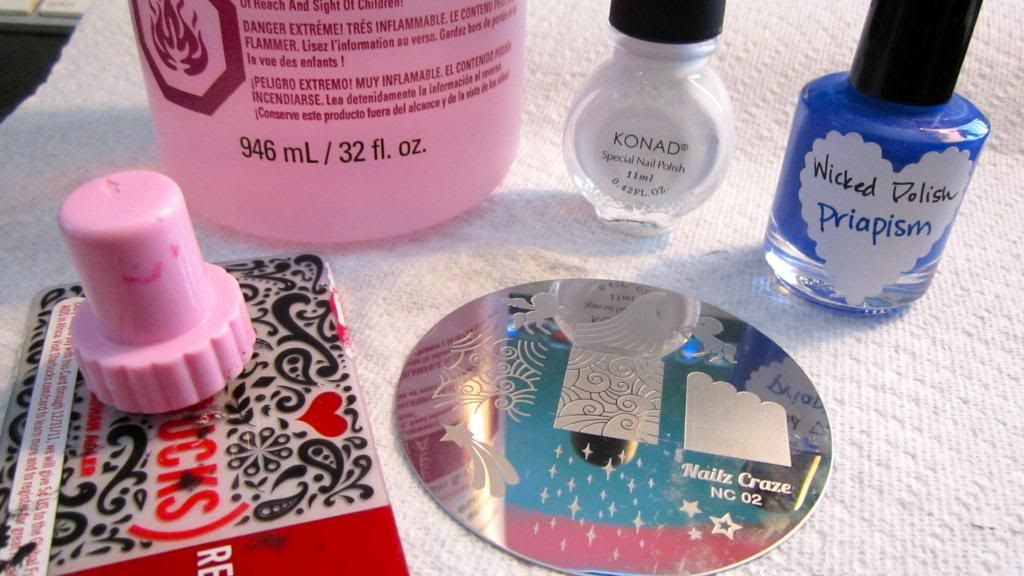
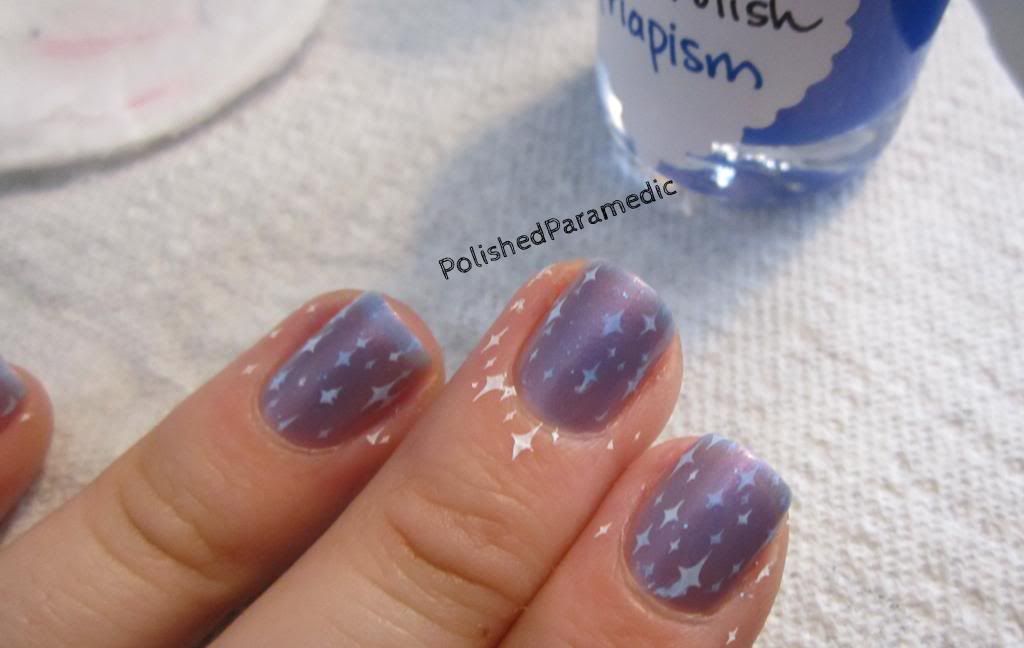
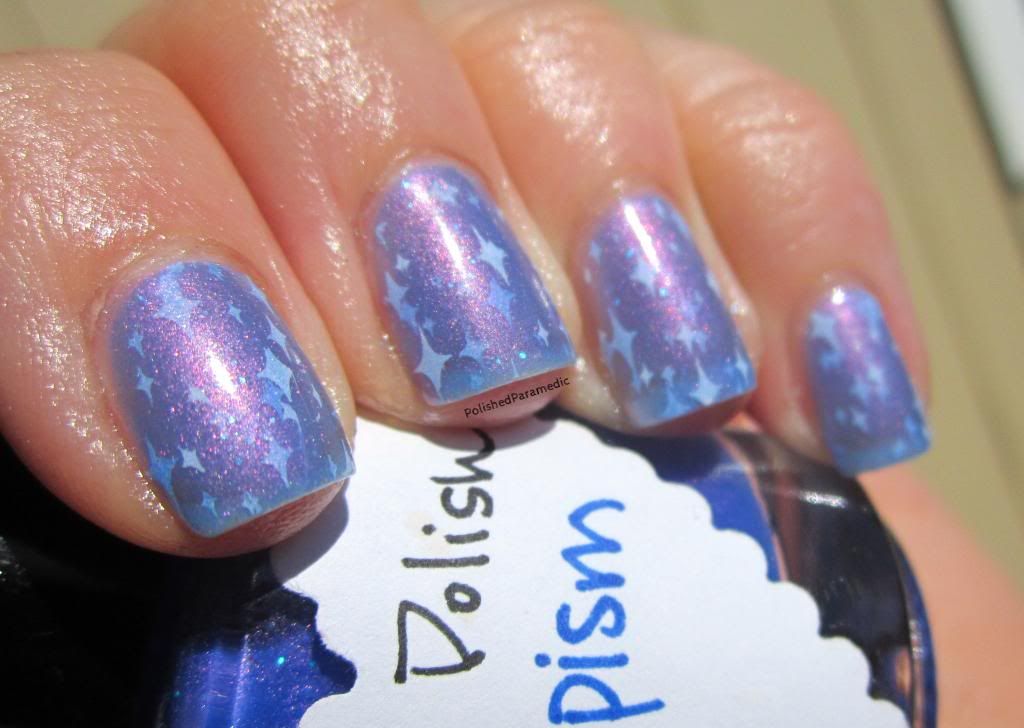
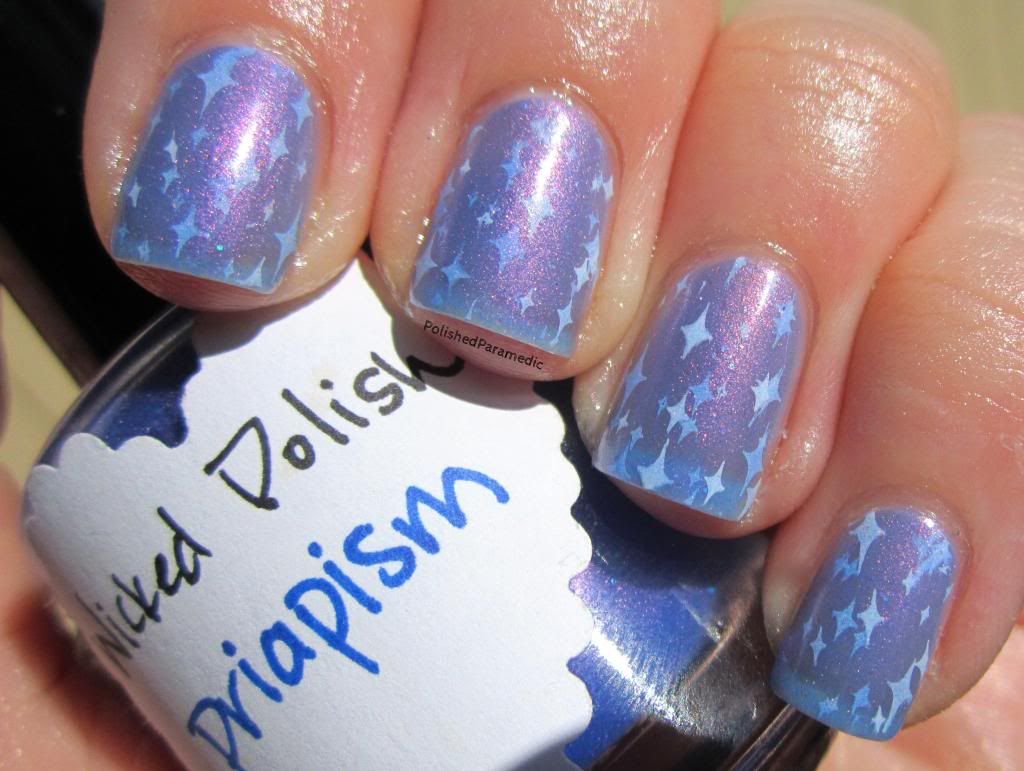
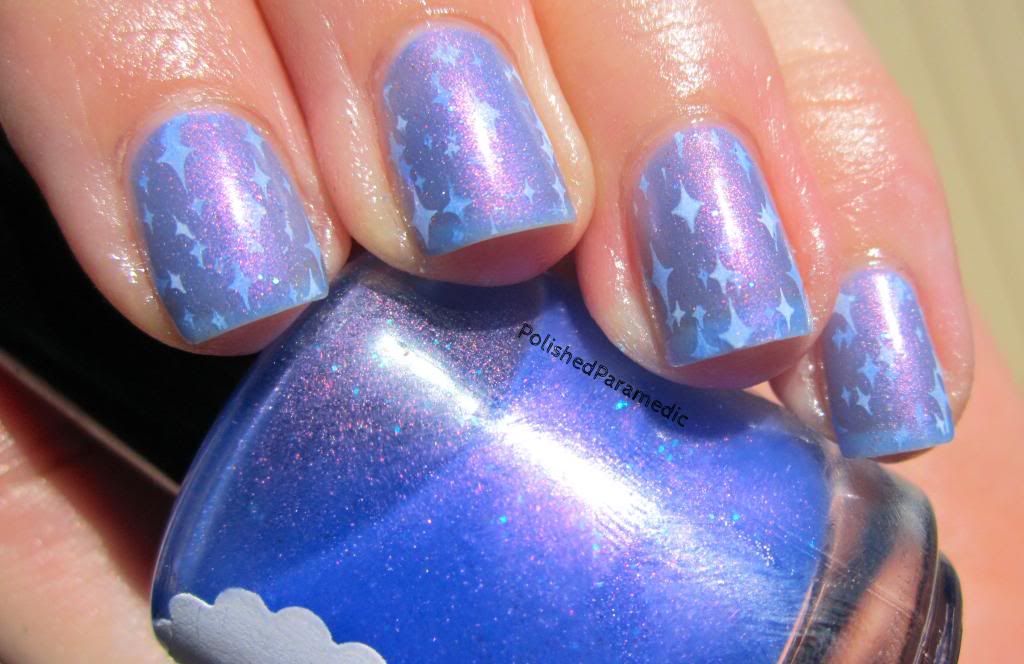
Start out with a "jelly"polish - a polish that is basically see through and has a jelly-ish texture to it. You can pick these out my checking to see if you can see the metal balls through the polish in the bottle. I own a few jellies, but since I wanted to do something epic, I decided to use a jelly that is also a duochrome AND has glitter in it! And thats how I decided on using Wicked Polish Priapism.
I love Rylee and her polishes. I really need to do a separate post about her polishes now that my computer is fixed...it might be a bit outdated since she changed her polish bottles though, but whats inside is still the same (plus she has some awesome new colors that I really need to get, and pretty much the best polish names on the market and totally appropriate for me! Priapism? Don't know what it is? Google it lol)
Back to the tutorial....
Pick your jelly polish and apply 1 coat as the base. I probably should have used 2 coats for the base since I am really not a fan of VNL (visible nail lines). Let this dry completely before stamping or adding your nail art. (you could use a dotting tool to get the flower effect in the original) I used a white polish for the "sparkles" but you could use any opaque polish. I used the NailzCraze NC02 Stamping Plate.
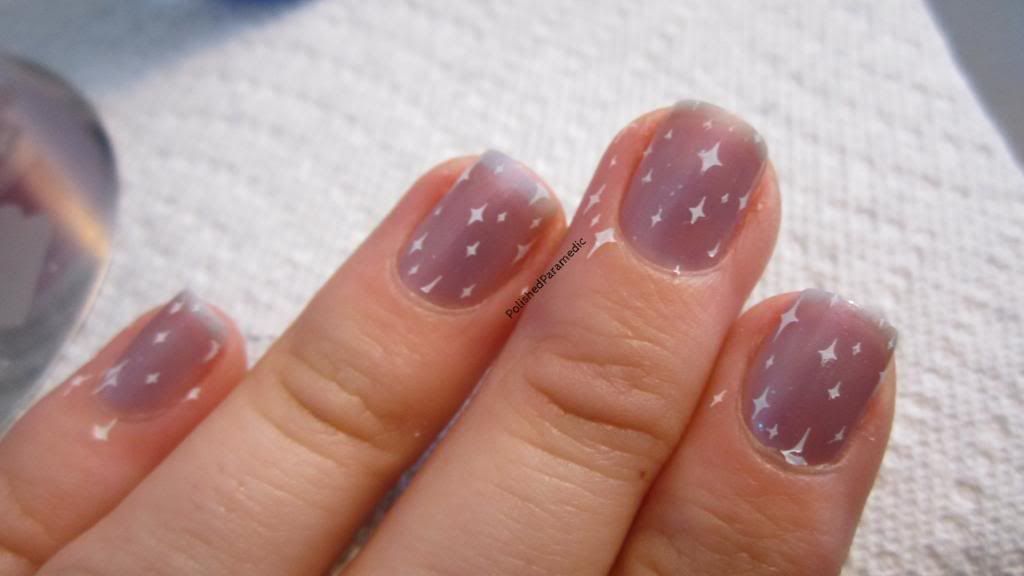
Wait for your first layer of art to dry so you dont smear the polish when you apply a 2nd coat of your jelly polish.

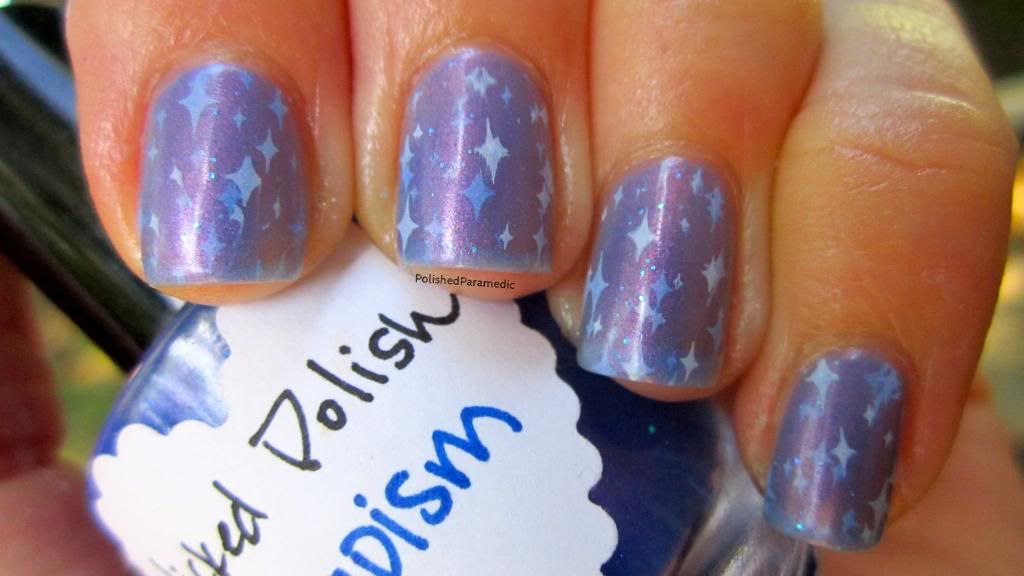
Continue the same dry, stamp, dry, polish pattern until you have reached as many layers as you like. I did 3 layers.
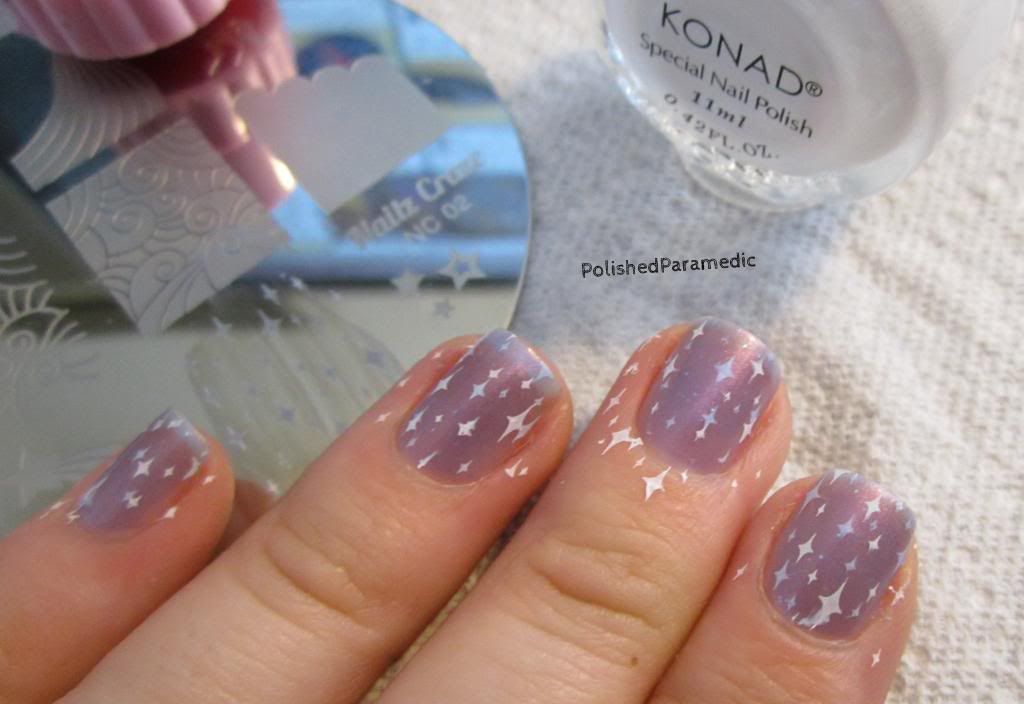
Add a final coat of polish - making sure to wait until your art is dry so you dont smear it!
Then finish with your cleanup if you chose and your topcoat of choice! Smother your hands in lotion before taking pictures too, so your fingers look like tiny greased up hot dogs.
Final product! I am pretty pleased with the results. Its not as epic and awesome as I pictured in my head but it still looks pretty cool. Now I am waiting for the deluge of nail art jelly sandwiches on the nailwebz - I am predicting this will be the "next big thing" in nail art! I really want to try this with a blue jelly and stars - I think that would look great with an American Flag accent nail! (Did I just come up with my 4th of July mani?!)
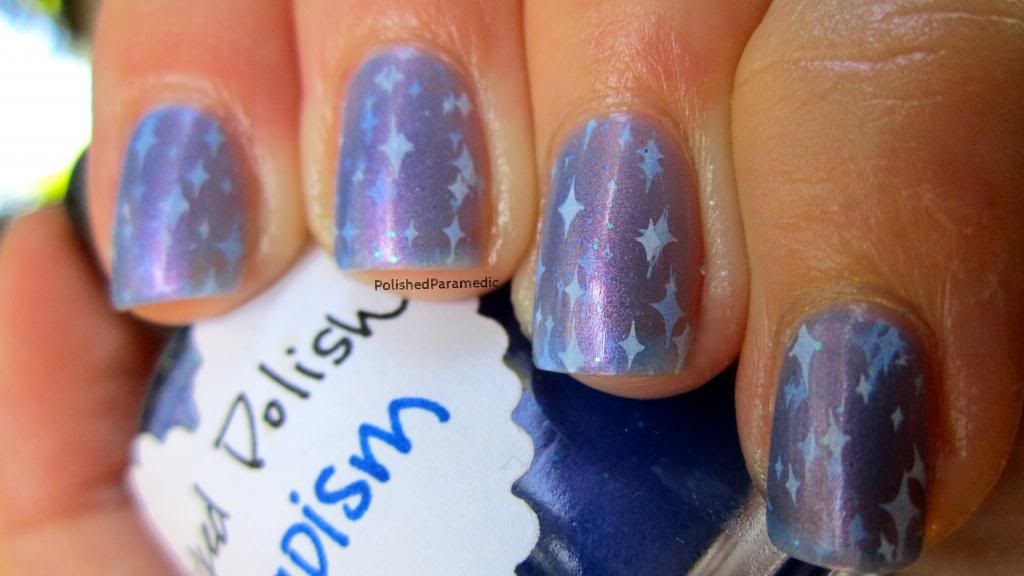
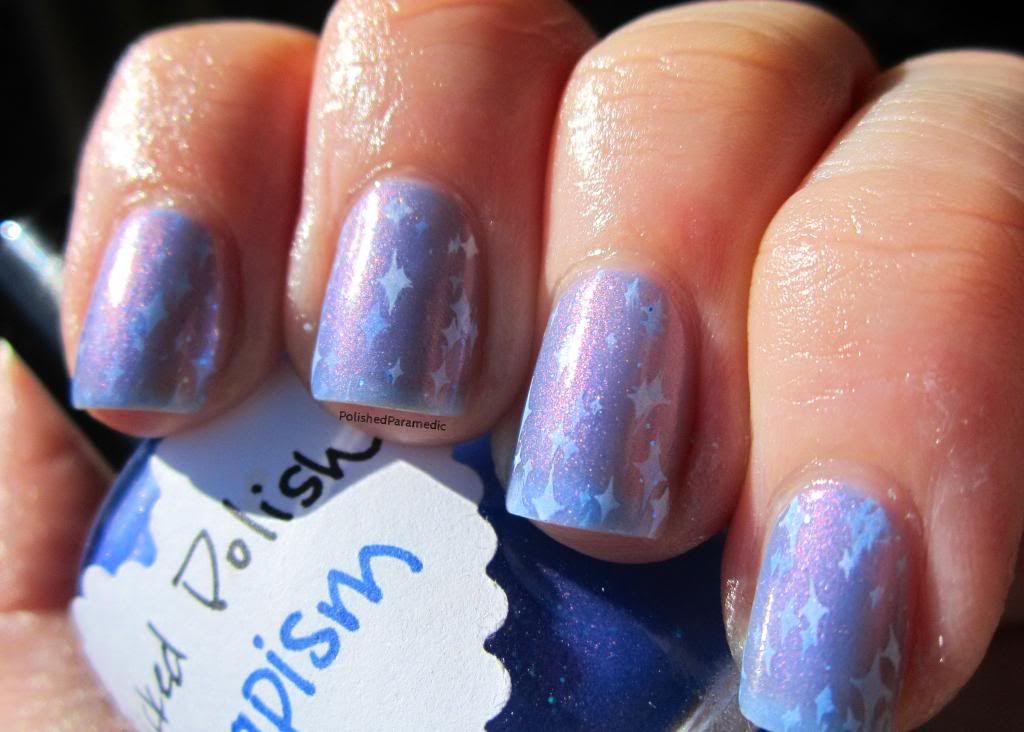
So looking at these pictures, I should have used a really opaque silver polish for the sparkles.
That would have been sweet.
Have a fantastic day you guys!! Thanks for reading :)
I NEVER managed to make my stamping kit work :( I am silly lol!
ReplyDelete