
First, a review of the plate. This thing is HUGE. Perfect for those of you who have curved or long nail beds and regular plates dont cover your entire nail. I dont have that problem because I have little nubs since they break so much. The designs are nice and crisp, and ORIGINAL! This is the only plate I have found that had that nordic sweater print on it (and I am definitely NOT going to attempt to freehand it). The plates are shipped from Israel so be prepared for a little bit of a wait to get them - I think mine took almost 4 weeks, but it was worth it! I plan on getting the Unicorn plate next (which i should have just bought at the same time as this one haha)
NC03 Plate-
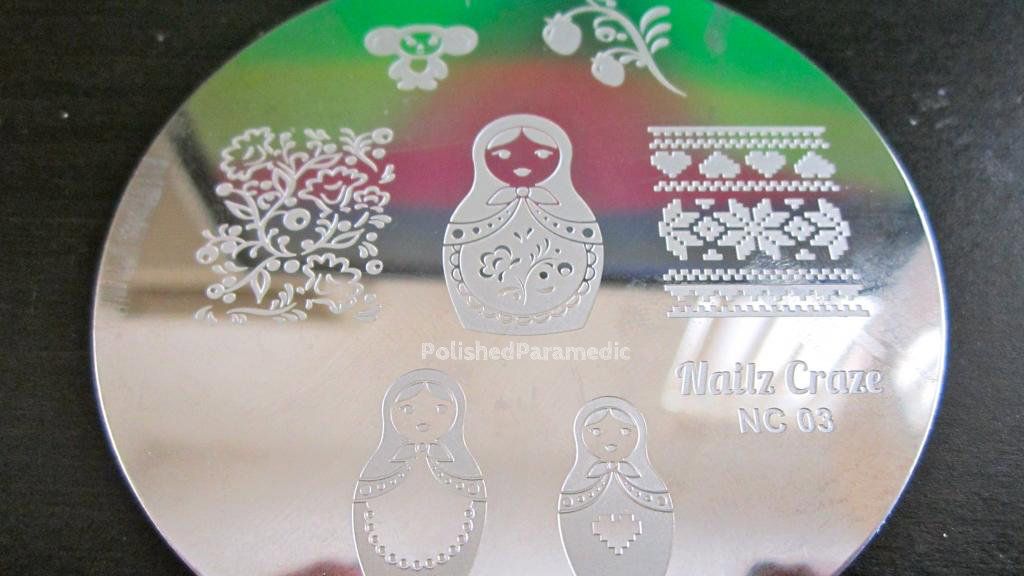
I love the floral design on it too. The Matroyshka dolls are so cute, but I think only the smallest one will fit on my nail. I was bummed I couldn't get the whole nordic sweater print on my nails either :( Oh well, such is life with sad short little nails!
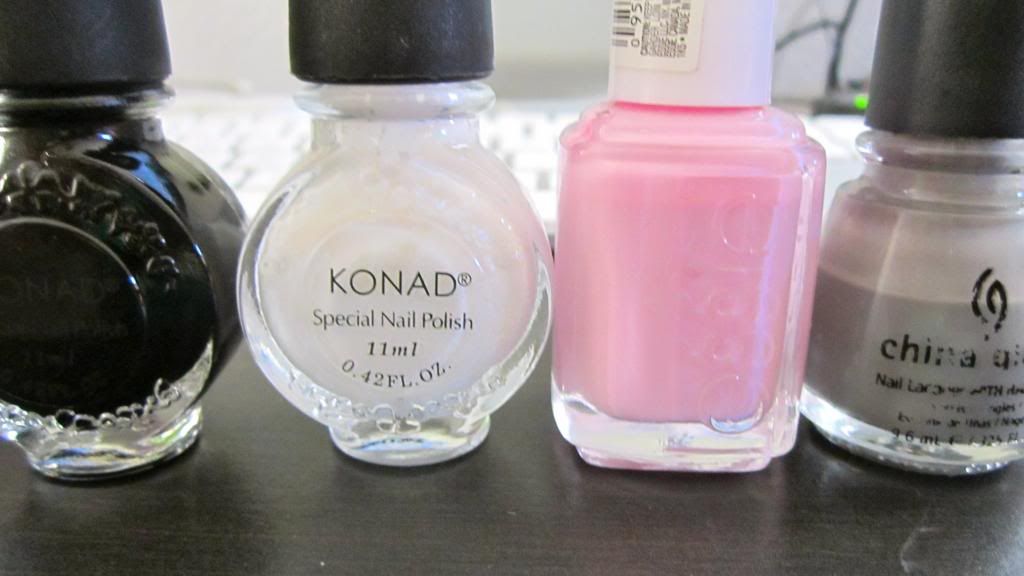
The polishes I used were Essie French Affair, China Glaze Recycle, and my Konad black and white stamping polishes.
I applied French Affair first (I think I used 2 coats) and let it dry completely before sponging on Recycle. I dont have any pictures of how to do sponging - this is my favorite sponging tutorial by the Nailasaurus, but I do mine slightly differently. I apply my base color first, and then sponge on the second color, starting at the tips and working my way up so it fades. I've tried the other way and I dont know if its because I'm using foundation sponges instead of more porous sponges, but it never works for me. It takes lots of practice (I had to do 2 nails over again, adding to my 3 hour mani haha) but I think the end result is beautiful!
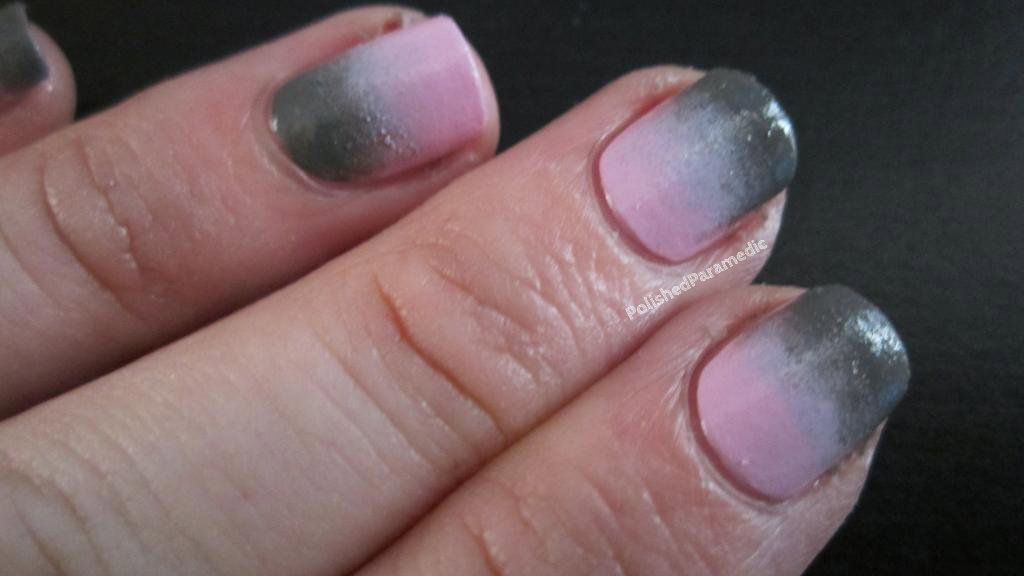
So after you are finished sponging, wait AGAIN for it to dry before you start stamping. You want 100% dry nails before you stamp because you dont want to smudge the polish underneath. Never put on a topcoat before sponging either, this keeps the stamp image from sticking to your nail!
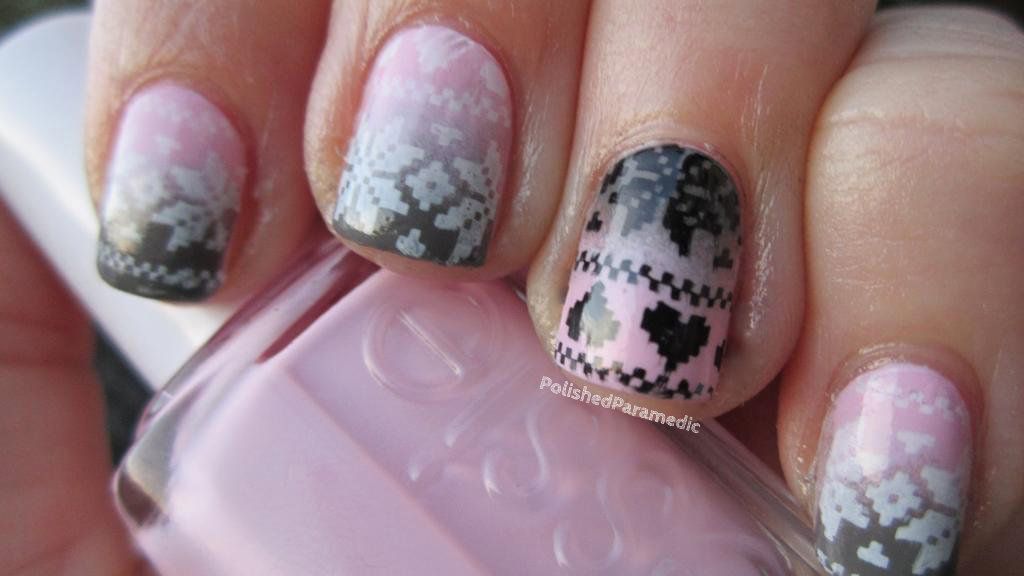
So I stamped away, no pictures of this process either (sorry!). Apparently I'm really bad at stamping in a straight line, because this time I had to redo 3 nails! And I kinda gave up on my right hand since I'm not taking pictures of that hand anyways. So, as you can see.....its not really in a straight line, but it looks great from far away! (WARNING : DONT CLICK ON THE PICTURES THEY LOOK HORRIBLE UP CLOSE)

I started running our of daylight to take pictures in outside so I had to go indoors under a lamp to finish off my photoshoot, which is why my skin looks orange in these last pictures. I swear I am not part oompa loompa.

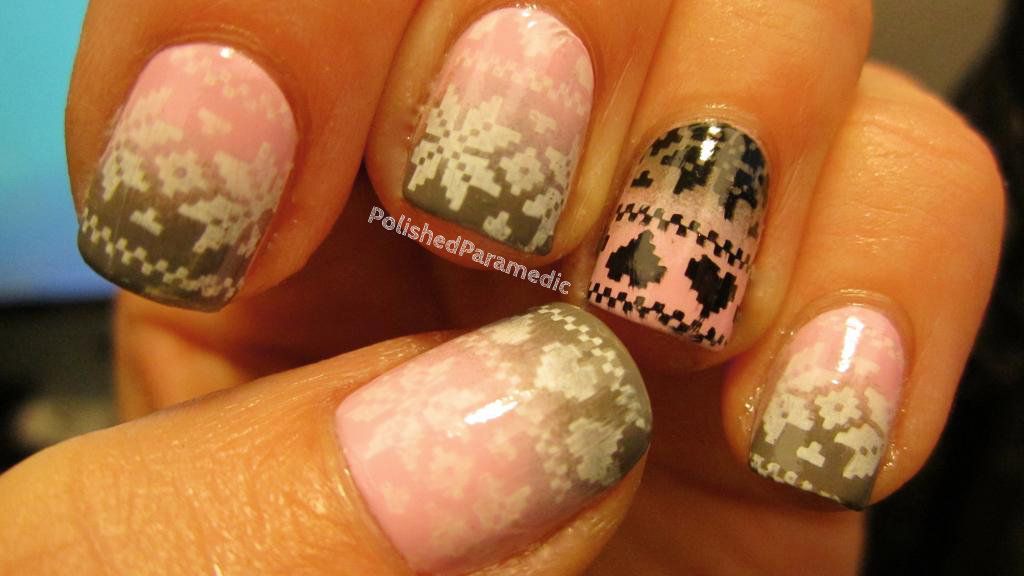
Sooooooo I didnt wait long enough to apply my topcoat after stamping because the stamp is all smeary and sad looking. So I will just look at my nails from afar. I really think this is one of my favorites so far. It was worth the 3 hours :)
Enjoy and stay warm out there!
-Victoria
It's design is so beautiful and its according to the winter season you also wear a sweater matched with this. Perhaps it may help you anywhere http://www.paramedical.com.au
ReplyDelete