Tuesday, November 5, 2013

Autumn Dahlias Tutorial

Oh heyyyyyy I kinda forgot I had a blog haha! Sorry to the few followers I have - things have been kinda crazy, I changed jobs and have had some family health problems to deal with, but IM BACK! Hopefully I will get back to posting once a week, or every other week. I always seem to kind of fall out of love with nail polish in the spring and summer, and fall back in love in fall and winter (because holiday nail art is just SO MUCH MORE FUN!)

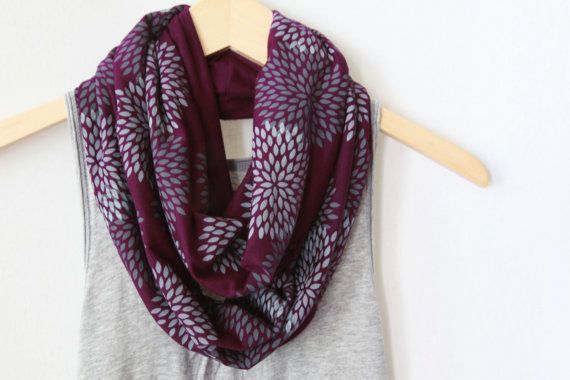
So this tutorial is actually really old. Like beginning of September old.  My camera broke so I'm having to resort to using my pathetic iphone 4 for a camera (another reason why there have been no posts!) Dahlias are my all time favorite flower. I may even name my daughter Dahlia one day. This was inspired by a print that I've been seeing on Etsy - particularly from I scarf I ordered from littleminnowdesigns!
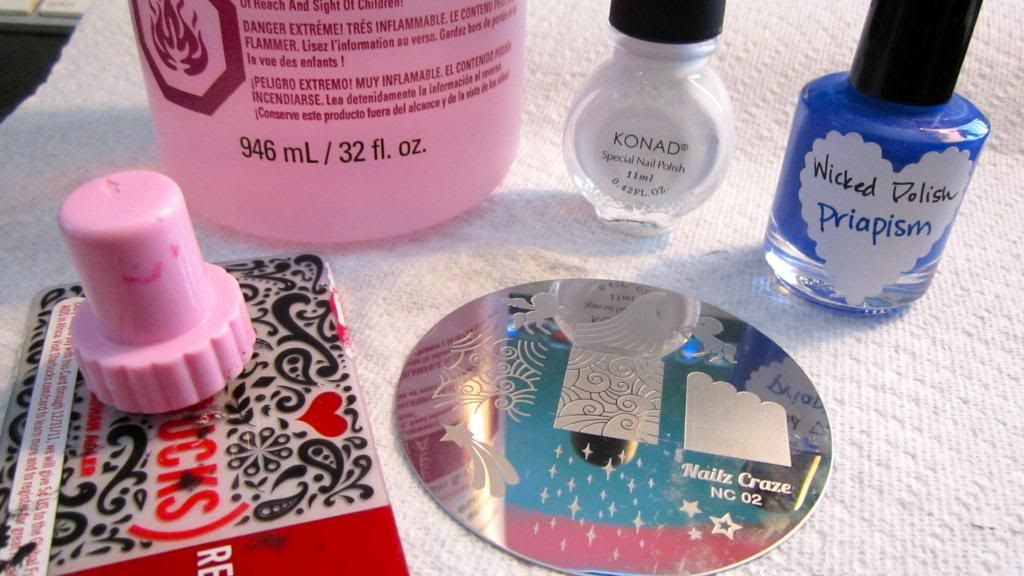

Materials -


The polishes I chose to use L-R are - OPI Crim-Sun, OPI Day at the Peach, OPI DS Signature, Color Club Cosmic Fate, Color Club Miss Bliss (All of them total holo goodness!)

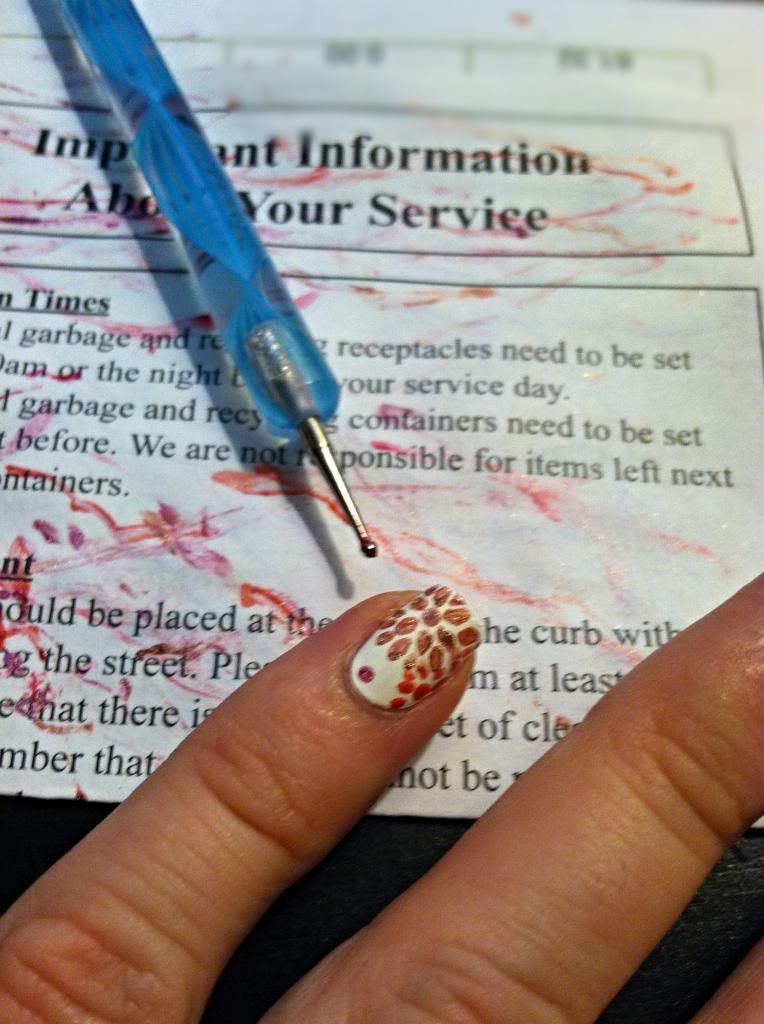
I wasn't really sure what to use to make the print, I kind of experimented on paper first to find the right size and decided on these tools.


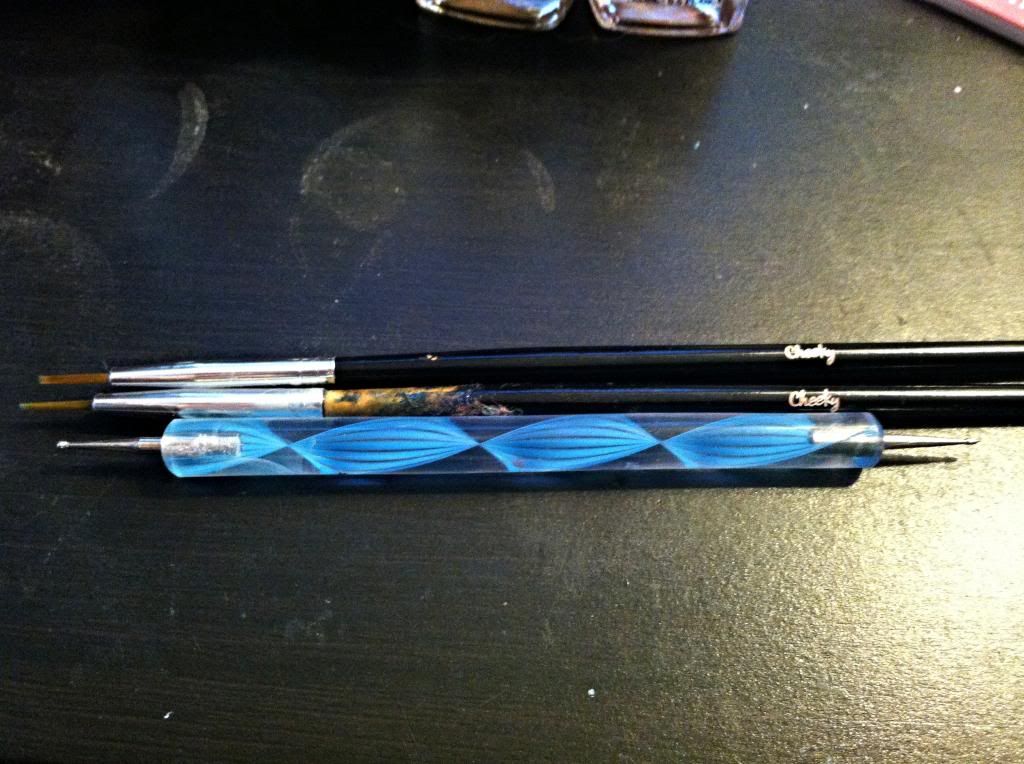
A tiny/small dotting tool, and two random striping brushes that kinda look a little destroyed - thanks acetone! (all bought from eBay)

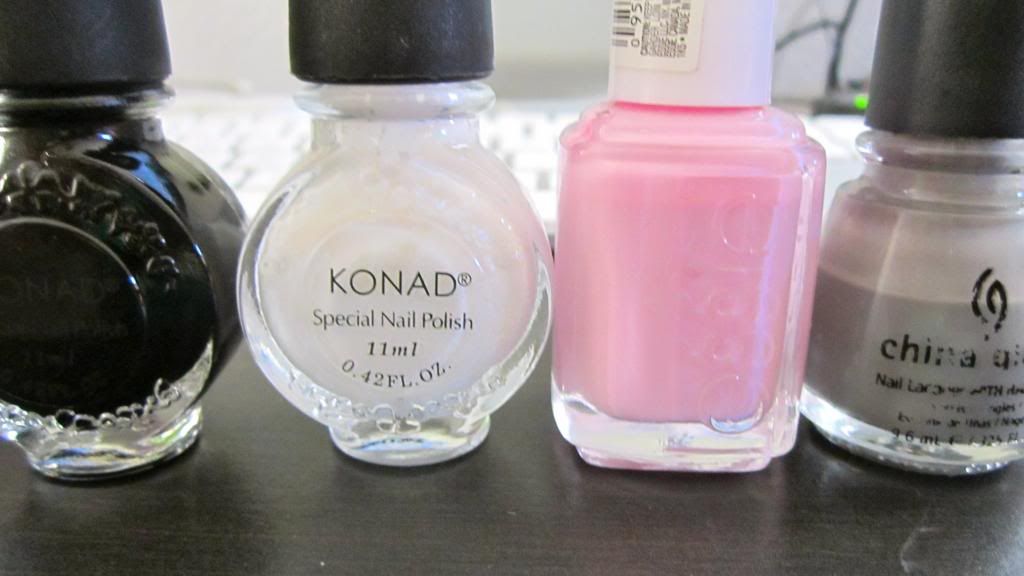
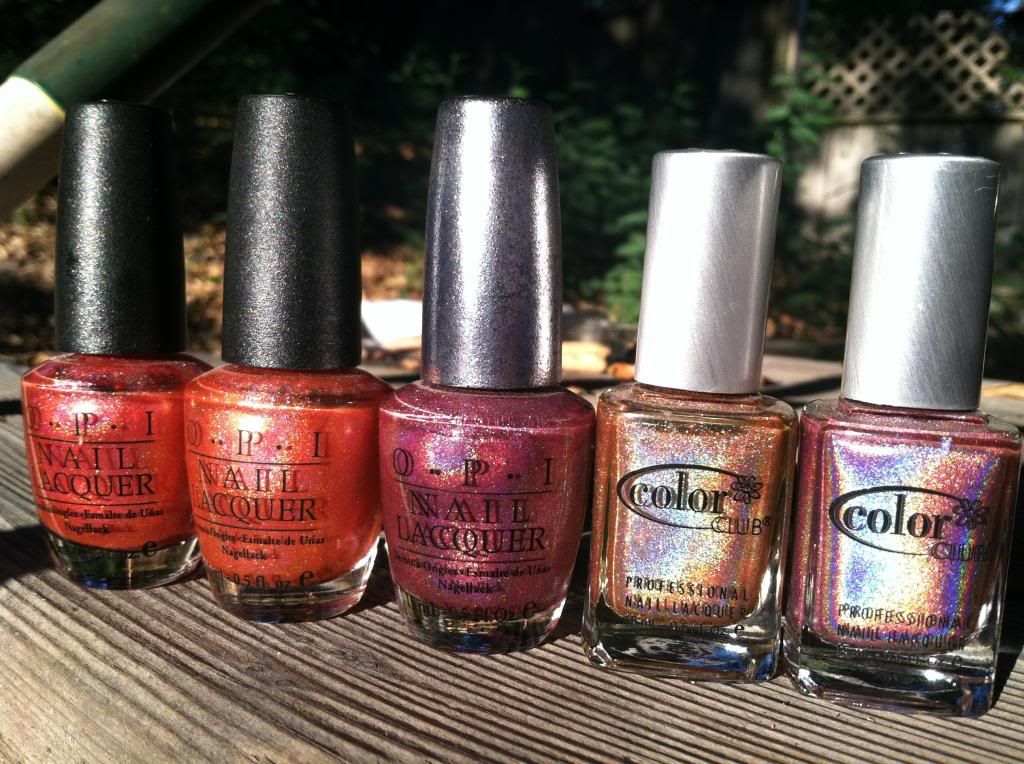
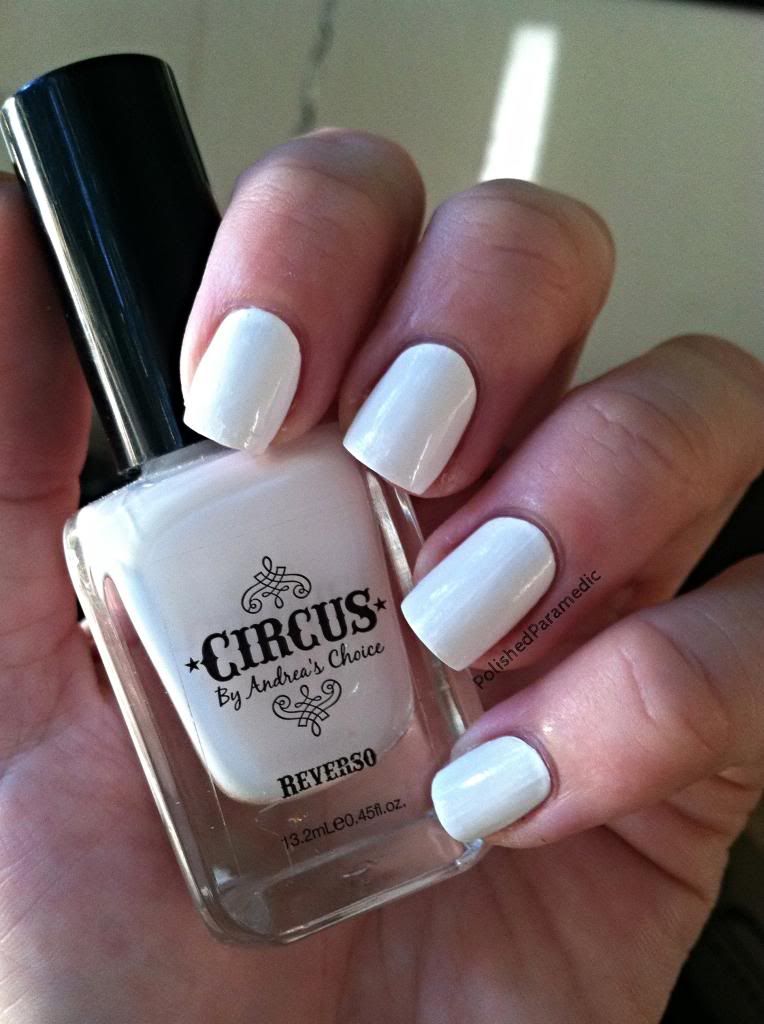
I started with a nice base of my favorite opaque white polish - Circus by Andrea in Reverso.


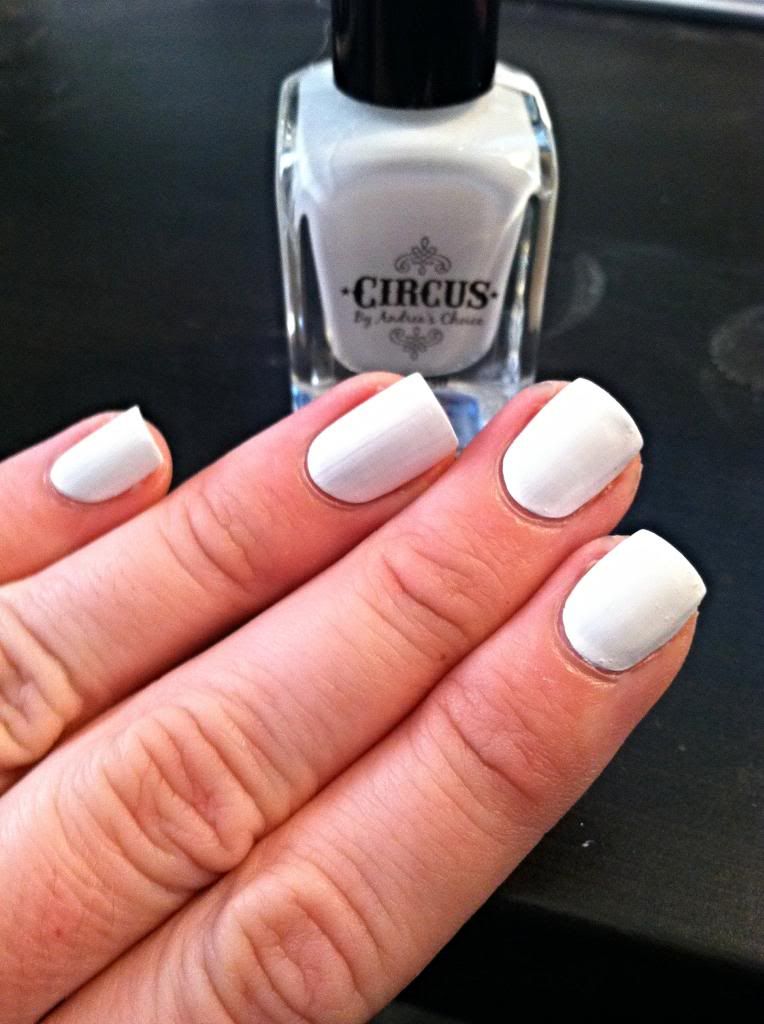
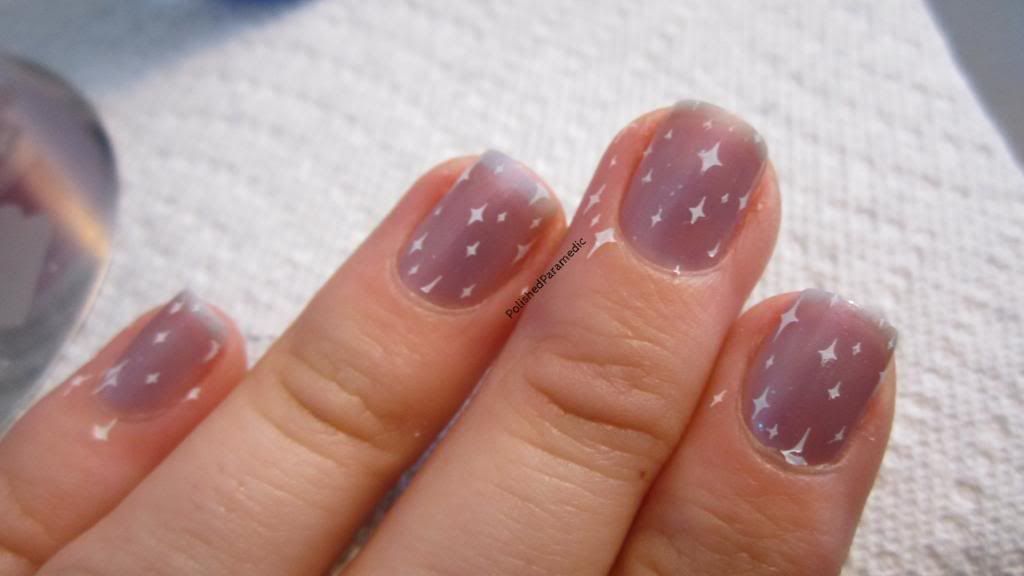
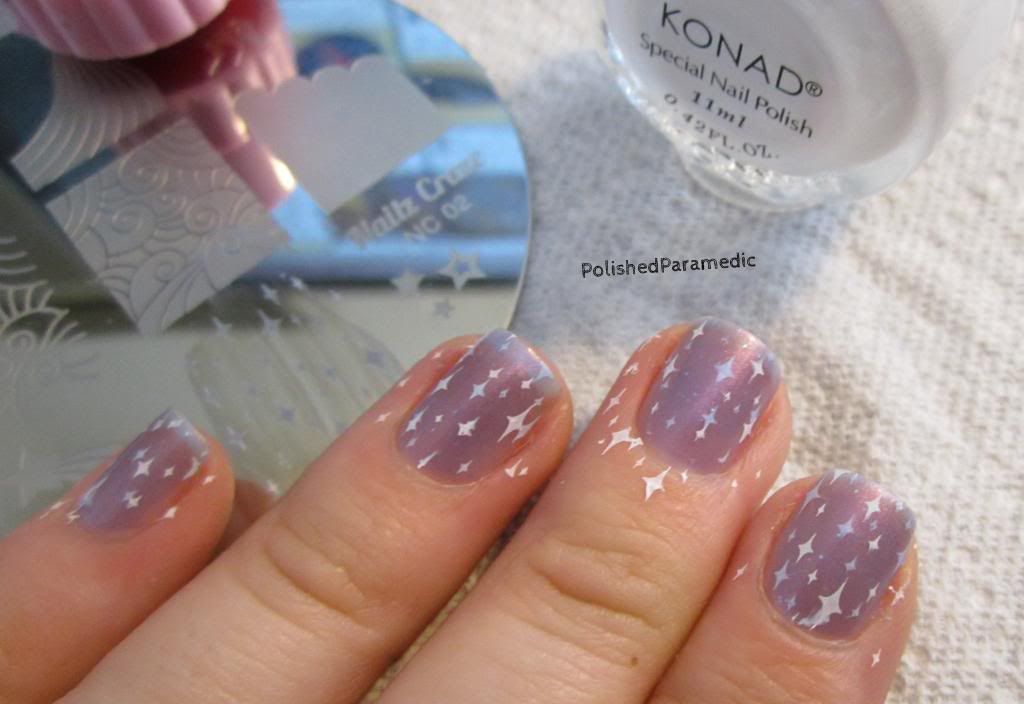
I used my dotting tool for the center part and then used the striping brush with a tiny blob of polish on the end and slightly applied it at an angle so it was more of an elongated dot.


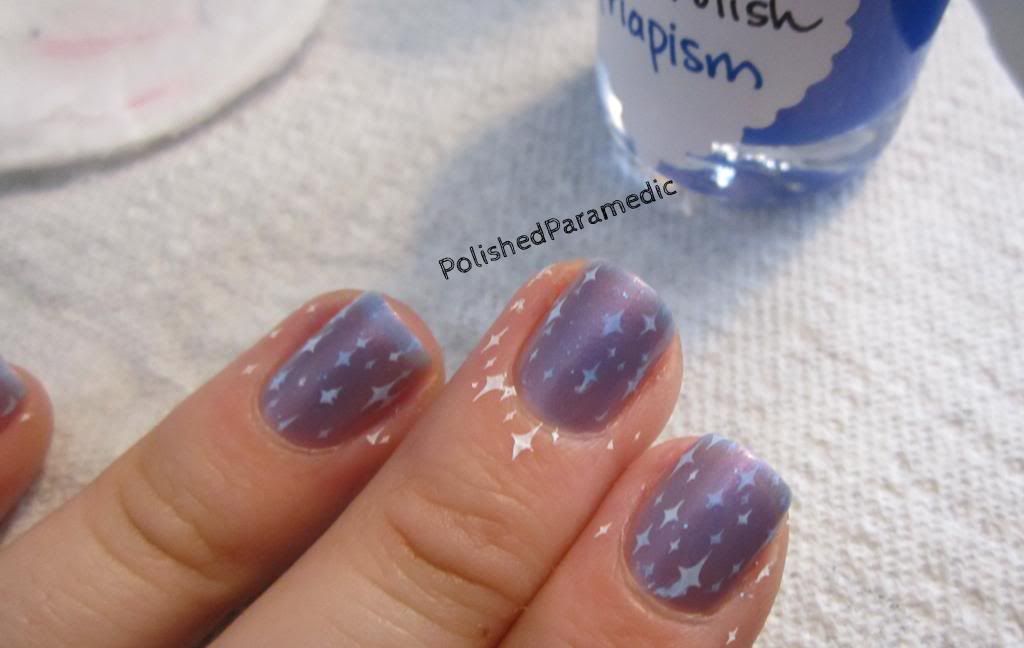
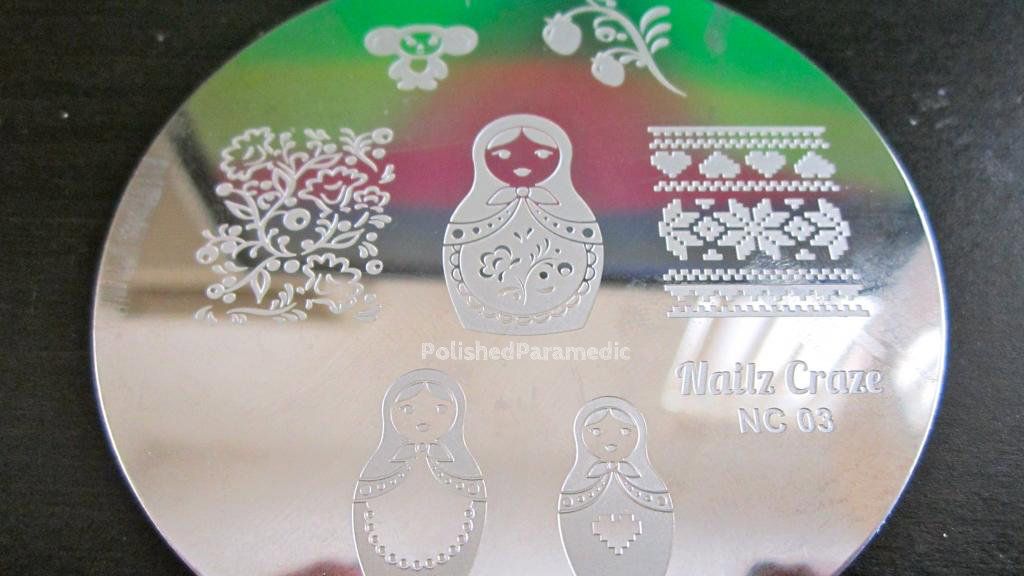
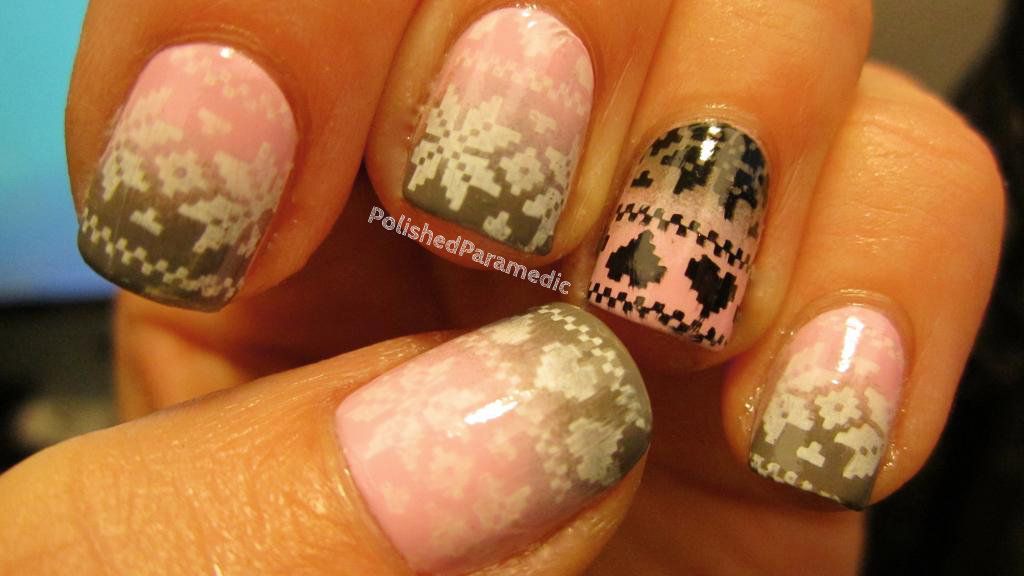
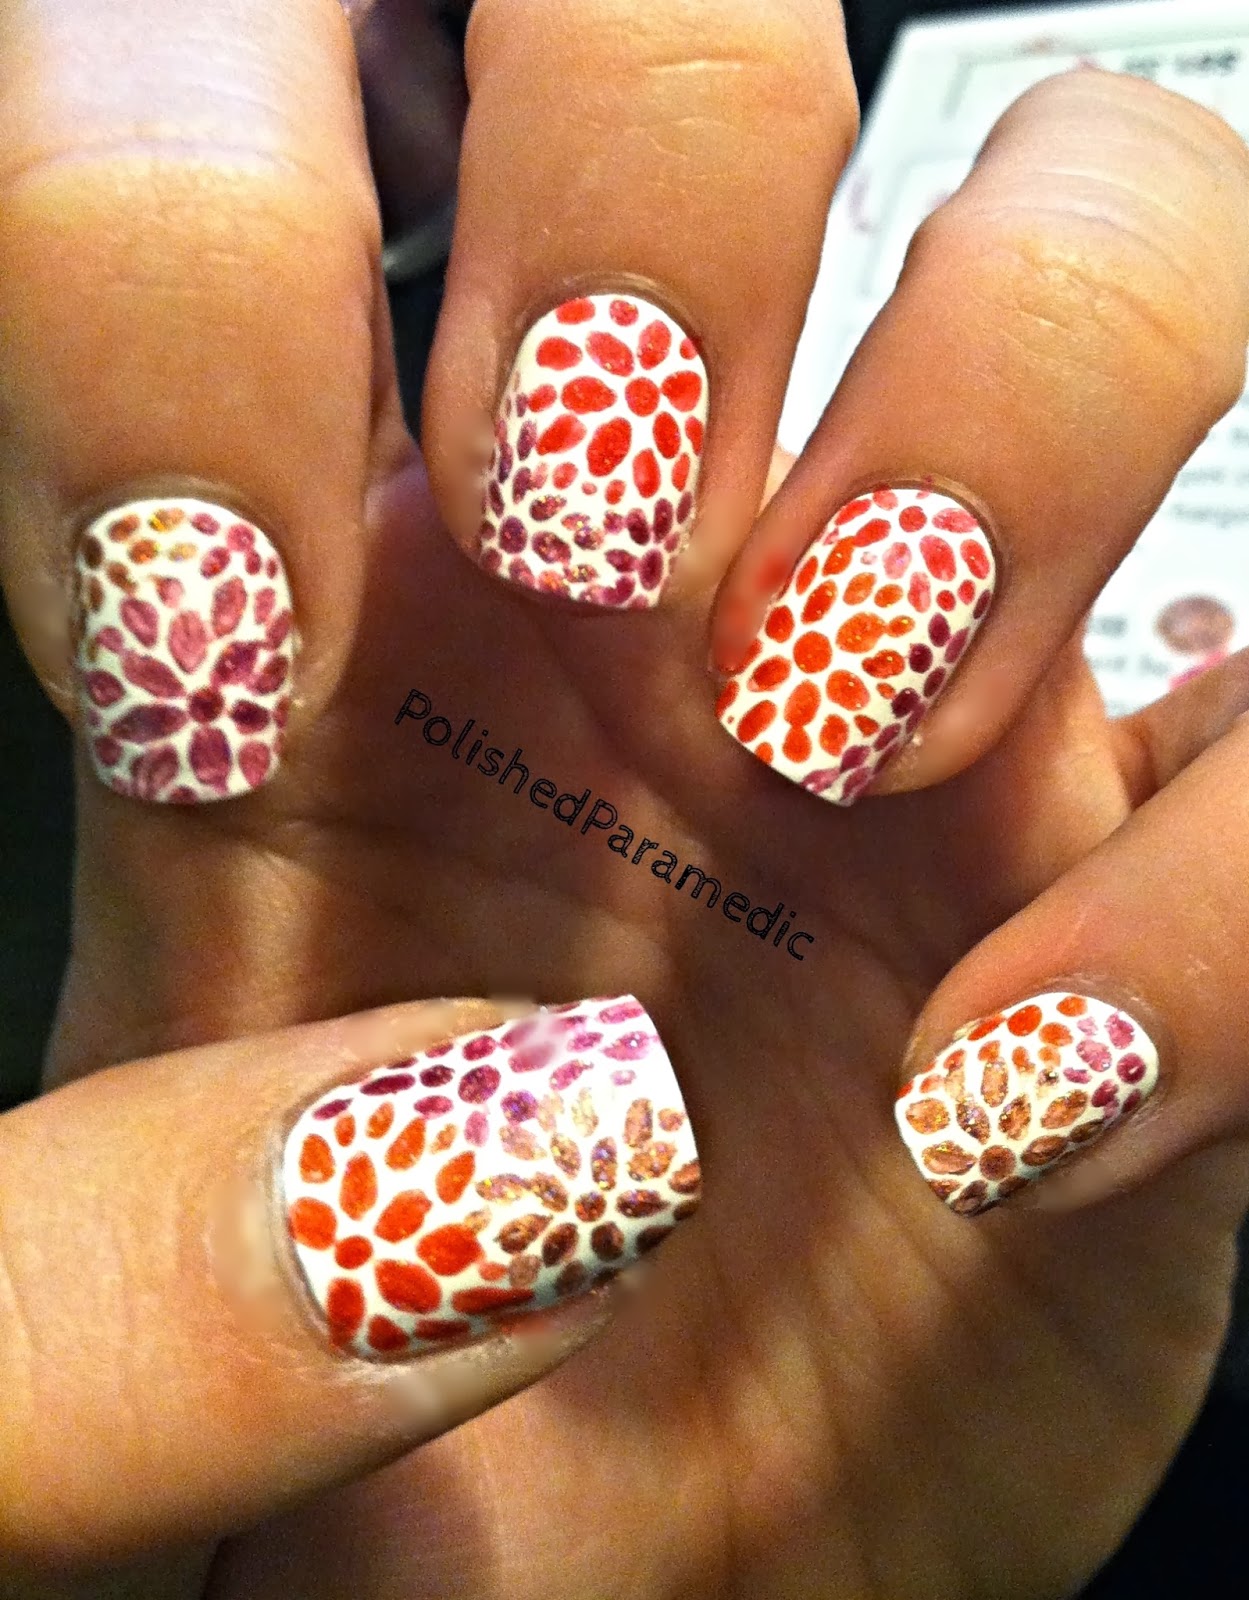
I did each nail individually and used colors randomly. I waited for the flowers to dry before applying my topcoat to prevent smudging. Unfortunately the sun went down as I was working on my nails, and by the time I got around to taking more pictures the next day, I had already chipped them. So this was the only picture I got. I wish I had an outdoors sunshine picture - these were awesome!!! I am definitely going to try this again - I actually found a stamping plate with a similar image that should make a much cleaner design, and will be alot easier and less time consuming! YAY!


I'm starting to plan out some of my Thanksgiving/Christmas manis! If there is anything in particular anyone would like to see (tutorials, swatches, etc) just let me know in the comments section! Dont forget you can also follow me on Instagram and Pinterest Thanks for reading!

Victoria :)


Thursday, April 18, 2013

Inspired By! A tutorial for an epic nail art sandwich! (I'm back!)

Yay! My computer is alive again!!! After a few months without a computer we finally got the hard drive replaced, and I have enough pictures to post here without having to do anything new!

But thats no fun.

And besides, I saw this amazing picture on Pam of Pam's Girly Bits Instagram and thought it was pretty fantastic and wanted to recreate it. But I couldn't just recreate it and post it on here. Thats kind of dumb. So I tried to do something different, and better! But I'm not sure if all my ideas into one mani played out well. You decide! (but please forgive my horrible stamping skills)

Materials -


Start out with a "jelly"polish - a polish that is basically see through and has a jelly-ish texture to it. You can pick these out my checking to see if you can see the metal balls through the polish in the bottle. I own a few jellies, but since I wanted to do something epic, I decided to use a jelly that is also a duochrome AND has glitter in it! And thats how I decided on using Wicked Polish Priapism.

I love Rylee and her polishes. I really need to do a separate post about her polishes now that my computer is fixed...it might be a bit outdated since she changed her polish bottles though, but whats inside is still the same (plus she has some awesome new colors that I really need to get, and pretty much the best polish names on the market and totally appropriate for me! Priapism? Don't know what it is? Google it lol)

Back to the tutorial....

Pick your jelly polish and apply 1 coat as the base. I probably should have used 2 coats for the base since I am really not a fan of VNL (visible nail lines). Let this dry completely before stamping or adding your nail art. (you could use a dotting tool to get the flower effect in the original) I used a white polish for the "sparkles" but you could use any opaque polish. I used the  NailzCraze NC02 Stamping Plate.


Wait for your first layer of art to dry so you dont smear the polish when you apply a 2nd coat of your jelly polish.


Continue the same dry, stamp, dry, polish pattern until you have reached as many layers as you like. I did 3 layers.


Add a final coat of polish - making sure to wait until your art is dry so you dont smear it!


Then finish with your cleanup if you chose and your topcoat of choice! Smother your hands in lotion before taking pictures too, so your fingers look like tiny greased up hot dogs.

Final product! I am pretty pleased with the results. Its not as epic and awesome as I pictured in my head but it still looks pretty cool. Now I am waiting for the deluge of nail art jelly sandwiches on the nailwebz - I am predicting this will be the "next big thing" in nail art! I really want to try this with a blue jelly and stars - I think that would look great with an American Flag accent nail! (Did I just come up with my 4th of July mani?!)


So looking at these pictures, I should have used a really opaque silver polish for the sparkles.


That would have been sweet.


 Have a fantastic day you guys!! Thanks for reading :)

Friday, January 18, 2013

Just Swatch Me - Zoya Promo

I'm finally getting this post up! It has been sitting half finished for almost a week since I got my Zoyas in from the promo. And if you didn't know about the promo, I'm sorry its over. BUT They do it every January - 3 polishes for free, all you have to pay is the $10 shipping. Normally Zoya's are about $8 in b&m stores (You can find them at places like Ulta and WholeFoods) but this promo knocked them down to $3.33 a piece! Can't beat that with a stick!

So I was having such a hard time trying to pick colors. I think I'm in a rut. I dont know if I want to wear wintery colors or springy colors. I'm such a seasonal oriented person, AND indecisive. So I'm pretty helpless right now haha! So I just randomly picked some colors based of suggestions from some nail message boards and ended up with Ibiza, Aurora, and Blaze. I quickly swatched them for you guys - swatches are a little messy since I dont take the time to clean them up afterwards with my brush and acetone, and I dont put topcoat over them. Its just to give you a good idea what the color looks like, and I hope it helps someone out there make a decision. Unlike me. (haha!)

On to the swatching!

Zoya Ibiza - 2 coats. Gorgeous! A deep navy blue with glowy shimmer. I really do love this one. I feel like its the navy blue cousin of Chanel Malice (This winter's "It" polish).


Zoya Aurora - 3 coats. A jelly base with holographic glitter. I ordered this one for the name since Sleeping Beauty is my favorite move. I wish Zoya would come out with a polish named Victoria so I could buy it. I was a little underwhelmed by this one though.


Blurred to show to holo sparkle happiness 


The one thing I do find interesting and unique about this collection (the holiday 2012 Ornate collection) is that the glitter is almost like a little shard or flakie, not a regular glitter piece, so it is equally gorgeous in the shade/indoors! 


Zoya Blaze - this is my favorite of the 3. I think I used 3 coats. When I was putting it on I thought to myself that it looked really similar to another polish I own - Barry M Slammin' Red - which I love the color of but HATE how bad of a topcoat eater it is. I could put on 5 coats of gelous and 10 coats of topcoat and STILL have bumpiness an hour later. So I dont wear that because im not into that kind of stuff (you won't see me swatching any of those sand finish polishes on here lol!)

Blaze (this was with topcoat since I decided I wanted this to be my mani for the day)


I love how this polish changes colors. In the sun its a bright cherry red, inside it changes anywhere from almost a deep oxblood color to a rich apple red.


Look how different this color looks from the first picture! Amazing! (or maybe I just have a shatty camera...which would also mean I have shatty eyeballs too)


So here is the comparison between the two. I have it labeled in the picture. Slammin' Red is significantly more holo and sparkly, but the formula on the Zoya is so much better. Its smooth, easy to apply, and its this shiny without topcoat! Love! I'm definitely keeping the Zoya and swapping away Slammin' Red. 


So lumpy!


Maybe I will hold on to Slammin' Red for a giveaway or blog sale when I get more followers - I'm up to 1400 page views! Woohoo!

Also, the NailzCraze contest has begun! If you remember the wintery sweater nails I did for the contest please go vote for me here! Just leave a comment at the bottom of her page letting her know how much you love and adore entry #9 :) 

Thanks for reading, enjoy!
-Victoria

Wednesday, January 9, 2013

Wintery Sweater Nails! (A semi-how-to)

YAYYYYYYY!!!!!! I have been waiting to do this mani since I ordered my NailzCraze plate in the beginning of December. Missed Christmas but I had some non-Christmassy ideas for it too :) And since Natalie is doing a contest featuring her stamping plates (which you can buy here and read her blog here!) I painstakingly spent 3 hours on this mani to enter!

First, a review of the plate. This thing is HUGE. Perfect for those of you who have curved or long nail beds and regular plates dont cover your entire nail. I dont have that problem because I have little nubs since they break so much. The designs are nice and crisp, and ORIGINAL! This is the only plate I have found that had that nordic sweater print on it (and I am definitely NOT going to attempt to freehand it). The plates are shipped from Israel so be prepared for a little bit of a wait to get them - I think mine took almost 4 weeks, but it was worth it! I plan on getting the Unicorn plate next (which i should have just bought at the same time as this one haha)

NC03 Plate-


I love the floral design on it too. The Matroyshka dolls are so cute, but I think only the smallest one will fit on my nail. I was bummed I couldn't get the whole nordic sweater print on my nails either :( Oh well, such is life with sad short little nails!

The polishes I used were Essie French Affair, China Glaze Recycle, and my Konad black and white stamping polishes.


I applied French Affair first (I think I used 2 coats) and let it dry completely before sponging on Recycle. I dont have any pictures of how to do sponging - this is my favorite sponging tutorial by the Nailasaurus, but I do mine slightly differently. I apply my base color first, and then sponge on the second color, starting at the tips and working my way up so it fades. I've tried the other way and I dont know if its because I'm using foundation sponges instead of more porous sponges, but it never works for me. It takes lots of practice (I had to do 2 nails over again, adding to my 3 hour mani haha) but I think the end result is beautiful!


So after you are finished sponging, wait AGAIN for it to dry before you start stamping. You want 100% dry nails before you stamp because you dont want to smudge the polish underneath. Never put on a topcoat before sponging either, this keeps the stamp image from sticking to your nail!

So I stamped away, no pictures of this process either (sorry!). Apparently I'm really bad at stamping in a straight line, because this time I had to redo 3 nails! And I kinda gave up on my right hand since I'm not taking pictures of that hand anyways. So, as you can see.....its not really in a straight line, but it looks great from far away! (WARNING : DONT CLICK ON THE PICTURES THEY LOOK HORRIBLE UP CLOSE)


I started running our of daylight to take pictures in outside so I had to go indoors under a lamp to finish off my photoshoot, which is why my skin looks orange in these last pictures. I swear I am not part oompa loompa.


Sooooooo I didnt wait long enough to apply my topcoat after stamping because the stamp is all smeary and sad looking. So I will just look at my nails from afar. I really think this is one of my favorites so far. It was worth the 3 hours :)

Enjoy and stay warm out there!
-Victoria